Greetings again!
I have a little work here specially dedicated to my bro Ray, it was supposed to be finished by his birthday 2 months ago but then I'm late again... v___v .... sorry bro...
This is a color pencil piece. The last time I touched color pencils was 2 years ago. Lately, I was haunting my favorite stationery shop when I found this 60 color box. It was meant for children, I think, and cost $11. Brings me back to the memory of my childhood days, when my mom could only afford me a 12 piece box for school and I was always fascinated by my classmates' bigger boxes & variety of colors.
This set is not as good as the more professional types I can afford to use these days but I would like to see what I can really do with them. After all, this is the first time I ever own a 60 color set and it fulfilled my childhood dream in a way!
So here we go, beginning with:

A 3B pencil to sketch the outline and a kneadable eraser. I should be using a 2H for sketching when it comes to color pencil work but I don't like the hardness of the H pencils. I tend to press them harder and create some dents in the paper which would be devastating....
The smooth A3 size art cards. Why haven't I run out of them yet???

... and here's the star of the show, a 60 color pencil set. I always love the sight of multi colors... it makes me happy for no reason.

for some highlighting, I prepared a white Derwent watercolor pencil. It's soft and works like crayon... but I can only sharpen it with a knife and not my pencil sharpener.

Laying down the proportion with a rough sketch.

... getting there with the features...

... eyes & nose done...

... mouth, teeth & neck...

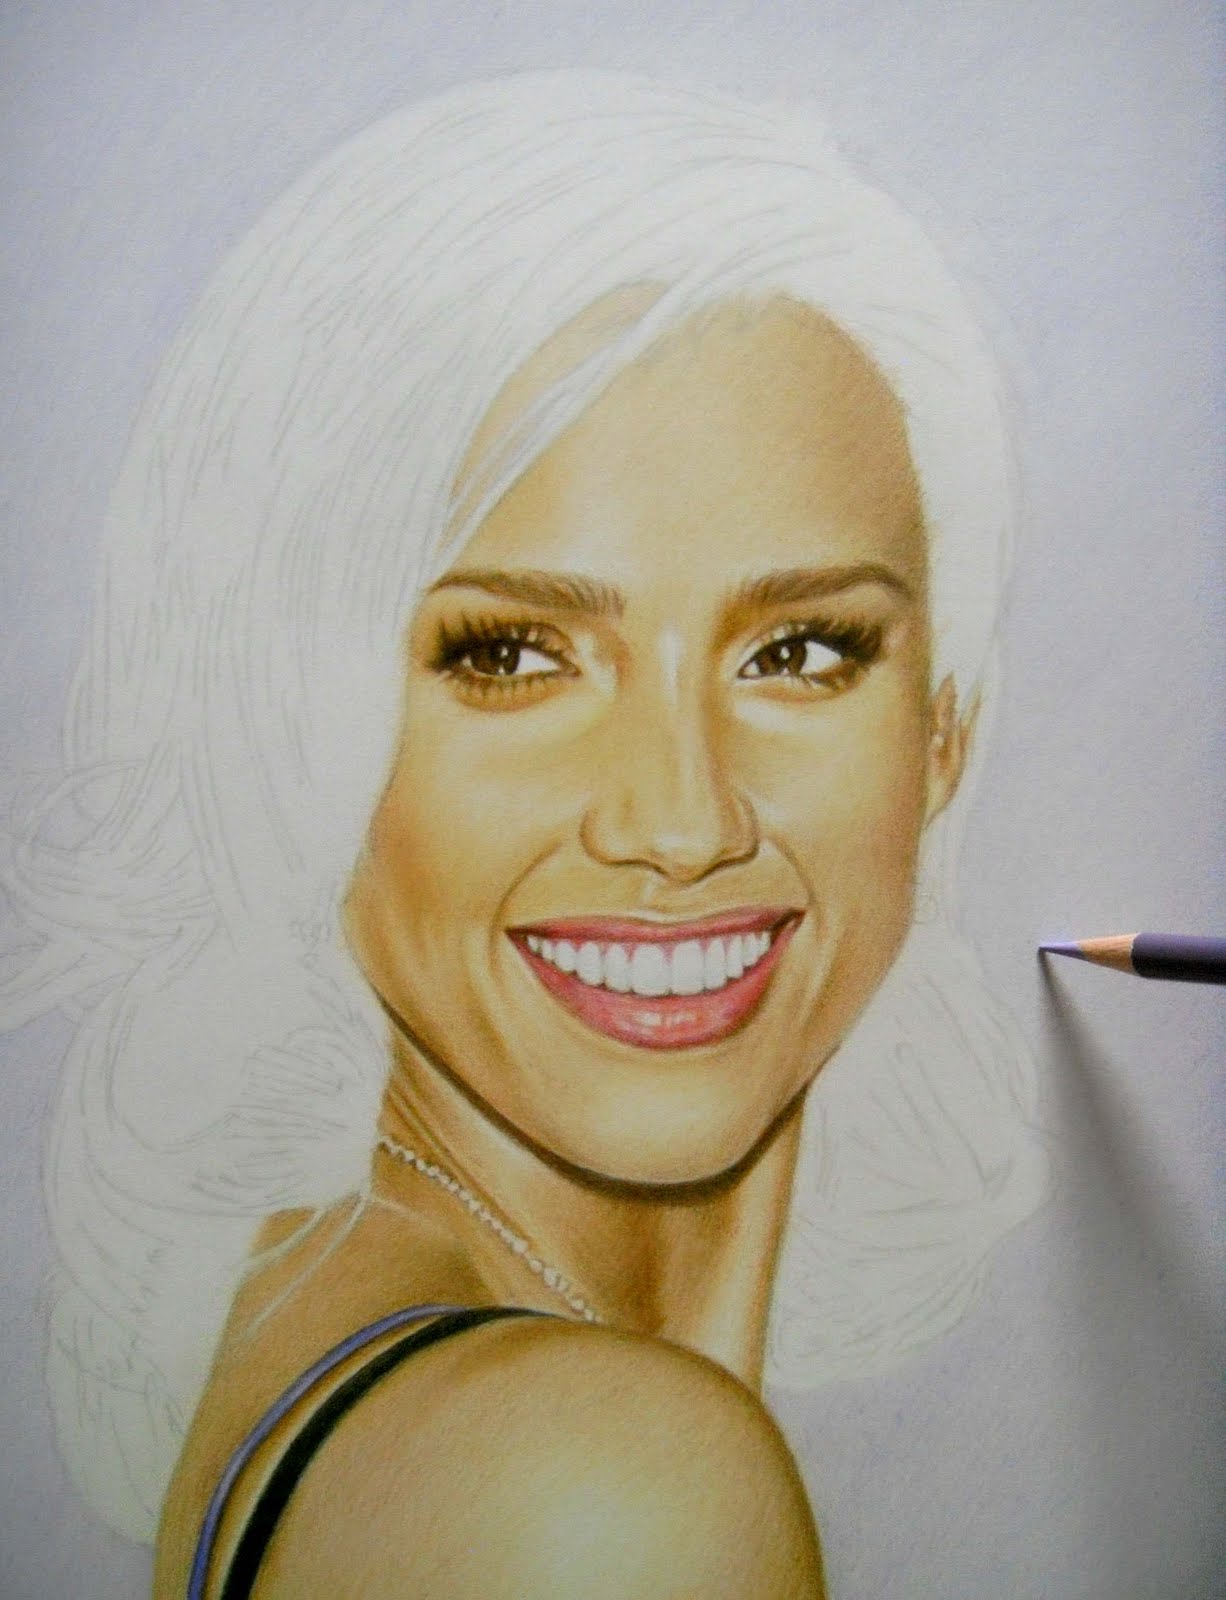
... skip to the big finish. The hair lines were very complicated and I had to check with a grid very carefully. It took me many hours to complete. Then I dabbed over the pencil lines with a kneadable eraser to lighten them so they would not smudge when the color is applied.

I started with a foundation of 'ivory'... It is pale yellowish.

... next, I work on the shading with 'pale orange'.

... slightly darker shading with 'light yellowish brown'.

... adding some bits of 'reddish brown'.

... defining the shading with 'brown'.

As I went on, I constantly came back to 'pale orange', coloring over the darker shadings and blending them more naturally.

... using the kneadable eraser to clean up some excess colors and create more highlights.

... working on the mouth and body after the face was basically done.

... darkening the shading further with 'vandyke brown', the darkest brown in the box.

... 'black' for the last. This is where the picture always come to life...
I colored the background with 'lavender' and 'violet'.

Working on the hair took many hours, applying:
1) cream yellow
2) light yellowish brown
3) reddish brown
4) brown
5) vandyke brown

All these would come to a rather light brown tone.

I like to save the 'black' for the last just to see the dramatic change it creates.

Finally, some bits of highlight with Derwent's 'chinese white'.
Like I mentioned before, I had to sharpen the tip with a knife instead of a pencil sharpener. I remember my mom sharpening my color pencils with a knife for me when I was a kid. She could do it so neatly and beautifully. I could never do that...

So here it is at last...
Sorry about the difference in tone between the photos and the final scan. I don't know how to manipulate photoshop over this matter because I'm a computer idiot...v___v
This one's for Ray, created with a certain childhood inspiration... n___n
This took me 36 hours and 15mins. I was working at snail's pace.
The colors had to be applied from the lightest tone to the darkest slowly and carefully because once a mistake is made with color pencils, it is very hard to remove or correct.
It was fun, though, even when I felt like I was going to die over it because it refused to finish...
Thanks for looking!
Amazing....I love how you detailed each step..I really need to learn how to color like that!
ReplyDeletelovey
ReplyDeleteWow! I'm suprised it turned out so well seeing as you didn't use artist colouring pencils. WIsh I could draw like that :) I once tried to do a colour portrait but it was a complete fail- so I'm just sticking to plain graphite for now :)
ReplyDeletehttp://thelittlemagpiegirl.blogspot.co.uk/
This comment has been removed by the author.
ReplyDeleteAmazing drawing and a very nice article. I have always done drawings in graphite only and recently did my first color drawing. This article is going to help me a lot :). Thanks. I just draw as a hobby taking some time out...usually 2-3 drawings a year at the most :(
ReplyDeleteTerrific portrait. Love to see how you built the portrait. Work in progress pics are good to see and certainly help all of us work on our process. Amazing.
ReplyDelete